
Cooking beef neck bones presents an opportunity for business owners to explore cost-effective and delicious meal options. These often-overlooked cuts of meat, when prepared correctly, can yield succulent results that delight customers and enhance menu offerings. Understanding the essential preparation steps combined with robust cooking methods is crucial. Each chapter will delve into preparation and pre-cooking steps along with practical cooking techniques suited for the stove, ensuring a culinary experience that balances efficiency and flavor.
From Cold Water to Comfort: Mastering Preparation and Pre-Cooking for Beef Neck Bones on the Stovetop
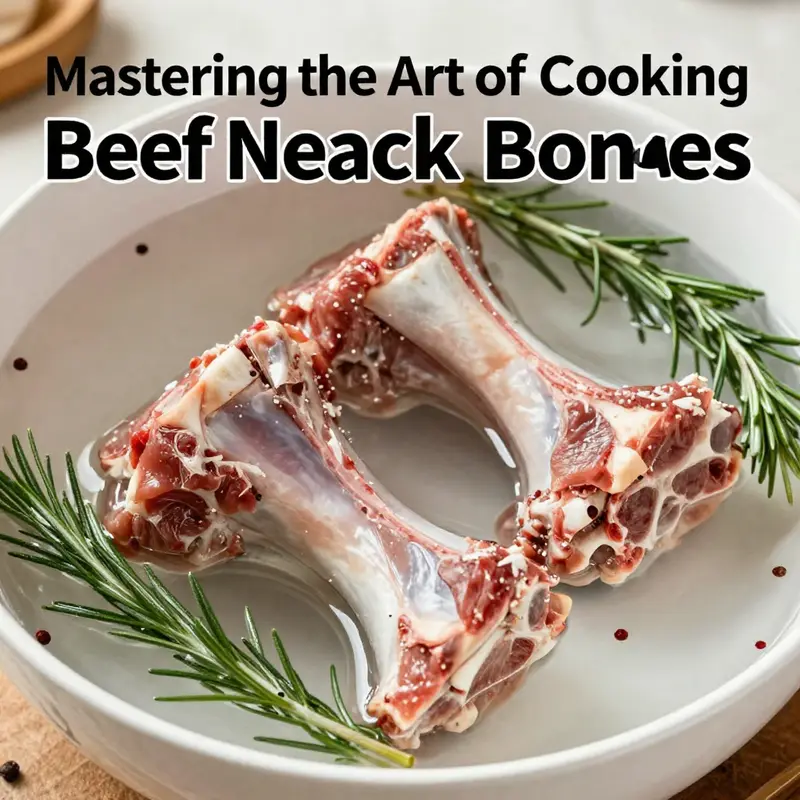
On the stovetop, the transformation of beef neck bones begins long before heat ever meets meat. It starts in a careful sequence of preparation and pre-cooking choices that set the stage for tenderness and depth. When you take the time to thaw properly, rinse, soak, and cleanse, you are not merely washing an ingredient; you are shaping the flavor, clarity, and texture of a dish that can easily go from rustic to refined with the right decisions. If your neck bones arrive frozen, thaw them slowly in the refrigerator overnight. Sudden warming invites uneven cooking and can invite a touch of rigidity in the meat. Once thawed, rinse the bones under cold water to remove surface debris. A brief soak in cold water for an hour or two, with a water change or two, helps draw out residual blood and impurities. This step matters more than it might seem, because it reduces the potential bitterness and helps the final broth shine with a cleaner, more concentrated beef flavor. The goal is not to strip away character but to reveal it more distinctly through careful purification. When you are ready to proceed, consider the blanching stage as a pivotal moment. Place the soaked bones in a large pot and cover them with cold water. Bring this to a boil over high heat, then reduce to a steady simmer. Foam and scum will rise to the surface in the first minutes; this is where you actively skim with a spoon, whisk, or ladle to remove the impurities that would otherwise cloud the broth and contribute off notes. The removal of this surface matter makes a tangible difference in the final appearance and taste, especially if you intend to use the bones for a clear, restorative broth or a bright, onion-forward stew. After the boil and careful skimming, drain the bones and rinse them under cold water until the water runs clear. This rinse step, though simple, helps ensure that any lingering residue is washed away. Do not use warm or hot water here, as abrupt changes can cause the meat to seize and toughen. Pat the bones dry with paper towels. The moisture on the surface is a trigger for uneven browning later, and even a small amount of surface moisture can interfere with the Maillard reaction that brings depth to the sear. A brief, deliberate searing phase follows. Heat a heavy-bottomed pot or Dutch oven over medium-high heat and add a small amount of oil. If you have blanched and rinsed well, the bones will brown evenly on all sides, developing a crust that is more than color—it is flavor in disguise. The browning is a gateway: the crusty exterior holds in juices and creates fond, those flavorful browned bits that will later enrich the liquid. Once the bones are evenly caramelized, remove them and set them aside while you build the flavor base. A classic foundation uses onion and garlic, perhaps with a hint of ginger or a brush of spice like cumin, coriander, or smoked paprika, depending on the direction you want to take. Sauté these aromatics in the same pot until they are fragrant and slightly translucent. This is not merely a background; it is the aromatic spine of the dish, tying meat, liquid, and herbs into a cohesive whole. Deglaze the pot with a splash of red wine, beer, or just hot water, scraping up the browned bits from the bottom. Those browned bits—fond—carry concentrated flavor that would be wasted if left behind. Return the seared bones to the pot and pour in enough hot water or beef stock to cover the bones by at least two inches. This generous depth is essential for a rich, nourishing broth and for tender meat. Aromatics such as a bay leaf, thyme, or a small bouquet of herbs can be tucked in at this stage to coax even more complexity from the simmer. The trick is to keep the simmer gentle. A vigorous boil can tighten meat rather than coax it into tenderness. You want a slow, steady simmer, where small bubbles rise and then retreat, allowing the collagen to break down without turning everything to mush. The gentle approach is a disciplined rhythm—watchful but not anxious, as you allow the bones to release their essence. Tenderness is the reward of patience: you may find the meat slips easily from the bone after two and a half to four hours, depending on the size of the pieces and your preferred texture. If you chose a pressure cooker or a slow cooker, the same principles apply, only the pace changes. In a pressure cooker, follow the same initial steps of soaking, blanching, and rinsing, then sear the bones if you wish, add aromatics, and seal for a high pressure cook time of roughly one hour to an hour and a half, allowing for natural pressure release. The slow cooker offers a hands-off luxury—after the same prep, place the bones in the cooker with enough liquid to cover, and let the low setting do the work for eight to ten hours. The connective tissue gradually dissolves, and the meat becomes tender enough to pull away from the bone with minimal effort. Throughout the process, keep the liquid at a gentle simmer, maintaining submersion of the bones to preserve an even extraction of flavor. Adjusting salt and other seasonings is best done toward the end of cooking. This is when you taste and refine, balancing salt with the natural richness of the stock. You might find that the broth needs a touch more salt, or perhaps a hint of acidity to brighten the palate. A little black pepper or a splash of wine can lift the depth without masking the core beef character. If your aim is to move toward a stew or a soup, the pre-cooking phase you have completed provides a clean, robust canvas. The bones have given you a backbone of flavor, and the liquid has collected the essence of your aromatics, vegetables, and herbs. At this point you may wish to introduce vegetables like onions, carrots, and celery, or you may leave the broth as a rich, pure consommé-like base. Either path rewards patience with deeply satisfying results. For readers who want a direct anchor to the cut and its preparation, you can explore more about the beef neck bones through the detailed guide available here: beef-neck-bones. As you plan your next step, keep in mind that the quality of water matters as much as the quality of the meat. Use hot water or hot stock to begin the simmer after you have prepped the bones. Cold water can shock the proteins, leading to a tougher texture. The pre-cooking sequence—thawing, rinsing, soaking, blanching, searing, and gentle simmer—may seem meticulous, but it translates into a final dish that is deeply satisfying. When you serve, you will notice how the broth glows with clarity and the meat yields with a gentle pull, signaling that the collagen has done its work and the flavors have aligned. A well-executed stovetop preparation of beef neck bones offers more than a meal; it provides a comforting, soulful dish whose aroma can fill a kitchen and linger on the palate. If you are aiming to keep this dish versatile, you can finish with a bright herb finish, a citrus note, or a few drops of a light finishing oil to add a modern sheen. The payoff is the sense of culinary precision that comes from patient preparation and careful heat management. External resource: https://www.seriouseats.com
Stovetop Alchemy: Slow-Simmered Beef Neck Bones for Rich Flavor and Tender Meat
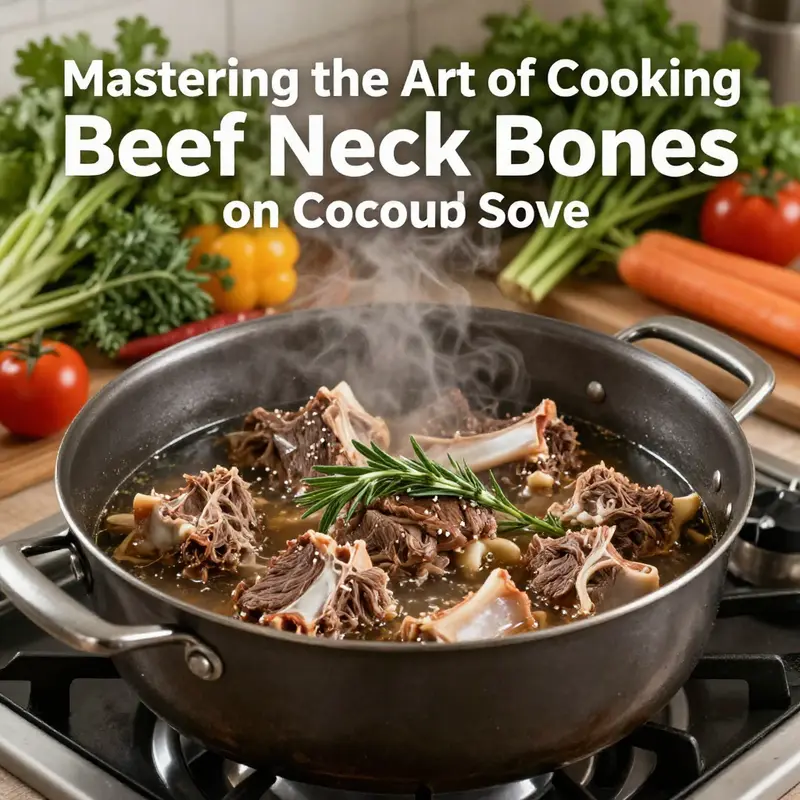
Beef neck bones on the stove invite a quiet transformation. They start as a sturdy cut, thick with connective tissue and marrow, and finish as something deeply comforting: meat that falls away with a gentle pull, and a broth that carries the fullness of the cut. The journey from raw bone to spoonable dish takes discipline and patience, but the technique rewards with flavor that whispers of long, patient evenings and a kitchen that smells of hearth and home. The bones themselves deserve respect. They are not a quick fix but a project for a pot that earns every hour of heat. The secret is to guide the neck bones through a sequence that cleanses, browns, and braises without rushing. The aim is to extract the collagen and marrow into the liquid while keeping the muscle tender enough to eat with ease. The result is a stock that doubles as a base for soups and stews and a meat that can anchor a weeknight meal or a weekend feast. As you read, you may notice a thread that ties all the steps together: start clean, move with intention, and let low heat do the heavy lifting. This approach borrows rigor from classic braising yet adapts to the realities of stove top cooking, offering a reliable method even when time feels tight. For a concise reference later, you can check the Beef Neck Bones guide. Beef Neck Bones guide
The first act is cleansing and preparing the bones so they behave rather than disrupt. Begin by trimming away obvious fat and any tough membranes that ride along the neck. This stage matters because excessive fat in the pot can render into a greasy, heavy broth, muting the meat’s natural sweetness. Then, to reduce blood and impurities that can dull the final flavor, soak the bones in cold water for a respectable stretch. A handful of salt per quart helps draw out residual blood, and a window of 30 minutes to two hours is plenty. If you can swing it, an overnight soak makes the effect more pronounced, though the core benefit is achieved with a solid soaking window. After soaking, drain the bones and proceed to the blanching step, which is essential for cleanliness. Place the bones in a large pot and cover with cold water. This detail matters: cold water heats gradually, allowing proteins to unfurl gently rather than sealing in blood and impurities as they hit a boiling start. Bring the pot to a vigorous boil, then immediately reduce to a simmer. As the liquid heats, you will see grey, milky foam and other impurities rise. Skim this scum away with a careful scoop for the first five to seven minutes. This continuous skim helps keep bitterness at bay and clarifies the brewing liquid. When the surface clears, lift the bones out with tongs and rinse them thoroughly under warm running water. Do not rush to rinse with cold water at this stage; cold water can shock the meat and make it tougher, whereas warm water preserves the texture and helps rinse away clingy particles. The result is clean bones that can lend their flavor cleanly to the pot without competing with off notes from improper pre-cooking cleanup.
With the bones cleaned and rinsed, you face a choice about how to proceed. Classic simmer is the traditional route for the stove top and yields tender meat and a rich, fully developed broth. Searing the bones first, though optional, is a step worth taking. A heavy-bottomed pot or Dutch oven heats evenly and can handle the browning stage without scorching. Pat the blanched bones dry and sear them on all sides until they develop a deep, caramelized crust. This Maillard reaction is not just for color; it locks in flavor and adds a dimension that boiling alone cannot deliver. Once browned, reduce the heat and let the aromatics enter the scene. Dice onions, garlic, and perhaps a touch of fresh ginger or dried spices such as cumin, coriander, or smoked paprika. Sauté these aromatics for three to five minutes until they release their fragrance, then watch your pot transform from a simple boil into a layered broth builder. The next step is deglazing. Pour a splash of red wine, beer, or even plain hot water into the pot and scrape the bottom with a wooden spoon to lift all the browned bits. Those bits are flavor treasure, and their return to the liquid forms a deeper, more complex base. Once deglazed, add enough hot water or beef stock to completely cover the bones by at least two inches. This extra depth matters because as the liquid reduces, you want to maintain a generous pool for the meat to stay submerged and flavorful. You may also add a bay leaf, a few sprigs of thyme, or a small herb bundle to weave in brightness and balance. The stage is set for slow, steady cooking.
The simmer method, sometimes called the classic simmer, is patient but forgiving. Bring the liquid to a boil, then reduce the heat to low and cover the pot tightly. Let the bones lounge in the gentle heat for two and a half to four hours, depending on their size and your tenderness target. The meat should become so tender that it pulls away from the bone with minimal coaxing. Throughout the simmer, peek in now and then to ensure the liquid remains at a gentle simmer rather than a furious boil. If the surface looks dry or the liquid level drops, add hot water or stock to keep the bones submerged. The beauty of this method is in the slow translation of collagen and marrow into a luscious, silky broth that carries a subtle sweetness from the bone marrow and the aromatics you chose. If you reach the end of the window and the meat still clings stubbornly to the bone, extend the simmer by a little, checking periodically. Patience here pays dividends in texture and depth of flavor. When the bones are done to your satisfaction, you can either pull the meat for serving as shredded morsels or remove the bones entirely, leaving a rich, marrow-infused broth that can form the foundation of soups, stews, or even a comforting sipping broth on a cold day.
If speed is the priority, the pressure cooker offers a brisk alternative that still respects the integrity of the meat and the flavor profile you are building. After soaking, blanching, and rinsing, sear the bones if you like, then add hot liquid to the pot with aromatics. Lock the lid, bring to high pressure, and cook for roughly sixty to seventy-five minutes. Allow a natural release for at least twenty minutes before opening. The advantage here is a set-it-and-forget-it approach that yields tender meat in a fraction of the time, while still delivering a broth with the same aromatic backbone you developed during browning and deglazing. If you prefer a hands-free option, the slow cooker is an excellent companion. After the initial preparation, transfer the blanched bones into the slow cooker, cover with hot stock or water, and let the device do the work on low for eight to ten hours or on high for four to six hours. The long, gentle heat in a slow cooker yields meat that falls apart with a fork and a broth that tastes deeply infused with all the flavor you introduced at the start. This set it and forget it approach is ideal for a weekend or a day when you want to come home to a ready-to-eat pot.
As you navigate between these methods, a few steadfast principles stay constant. Always start with hot liquid when returning to the pot after a pause, especially if you are adding stock and want to avoid shocking the meat. Keep the heat low and steady; rolling boil is the enemy of tenderness here. Do not skip the blanching; it sets the stage for a cleaner, more balanced flavor and helps prevent bitterness. When it comes to seasoning, wait until the meat is tender and the flavors have mingled before you settle on salt. You can elevate the finish with a light adjustment of salt, pepper, and perhaps a bright note of citrus zest or a splash of vinegar to sharpen the broth. If you enjoy a heartier finish, you can remove the bones at the end, pull the meat off, and return it to the pot to mingle back into the liquid. The broth can be strained for a clearer finish or left unstrained for a fuller texture and body. Either way, you will end up with a versatile base that begs to be ladled over mashed potatoes, spooned into bowls for a robust soup, or used as the foundation for a robust beefy stew that glows with the flavors of the neck bones.
One advantage of this approach is its adaptability. The same technique can be reused with modest adjustments to suit different dishes. If you want a lighter, cleaner broth, skip some of the browning and rely more on the aromatics and stock. If you crave a deeper, more robust flavor, allow a longer browning phase and use a richer stock as your base. If time is scarce but flavor remains paramount, the pressure cooker becomes your ally, offering tenderness without sacrificing the depth you earned with the browning and deglazing steps. And if you prefer a hands-off method for a weekend plan, the slow cooker delivers a meal that feels like a long slow Sunday without demanding your constant attention. Each path begins with the same careful preparation and builds toward a result that is unmistakably beef neck bones: a dish with texture, warmth, and a broth that invites another spoonful. The beauty lies in how a handful of simple techniques—soak, blanch, sear, deglaze, simmer—can unlock a current of rich, mineral-forward flavor that makes this cut shine in a stove top kitchen.
For those who want to explore more about the technique behind braising and why these steps matter, a broader braided understanding of the process can be enlightening. Braising is not merely cooking meat in liquid; it is a conversation between heat, time, and structure. The connective tissue slowly unwinds, releasing collagen that thickens the sauce and adds a lush mouthfeel, while the marrow contributes a gentle, savory depth. This interplay between moisture, temperature, and muscle fibers is what makes the neck bone a forgiving yet rewarding choice. As you move from the first steps of preparation to the final taste, you will find that even a relatively tough cut can become a comforting, deeply flavorful dish when treated with patience and respect. The exact duration of cooking will depend on bone size and personal tenderness preferences, but the underlying approach remains steady: cleanse, brown, deglaze, and braise with care. The result is a pot that feels both familiar and elevated, a reminder that good flavor often grows from straightforward actions performed well.
If you are curious about related techniques or wish to compare approaches, consider following the thread to additional resources on meat preparation and slow cooking. The journey through beef neck bones on the stove connects with broader practices in braising and stock building, offering a reliable template for future kitchen experiments and comforting weeknight meals alike. And as you head toward your next dish, remember that the real magic lies in the patient simmer and the way a simple bone can yield a generous, nourishing result. For a broader context on braising techniques, you can explore an external resource that delves into the science and craft behind slow cooking. External braising guide
Final thoughts
By mastering the techniques for preparing and cooking beef neck bones on the stove, business owners can elevate their culinary offerings, providing patrons with hearty, flavorful meals that are both satisfying and economical. This approach not only enhances the quality of dishes but also embraces the art of utilizing every part of the animal, reducing waste and maximizing resources. Incorporating beef neck bones into your menu is a strategy that can lead to increased customer satisfaction and loyalty.